Step-by-Step Interactive Google Slides Activities
- Miss Owens

- Jun 15, 2020
- 3 min read
I just finished creating over 300 drag-and-drop Google Slides activities for K-1 reading. It's not hard, but there are a few things I wish someone showed me at the beginning....
1. You Need Colored Clip-Art Sets to Get Started.
I purchased sets of clip-art on TeachersPayTeachers.com and Etsy.com. I simply typed in
the search box the exact reading skills I was looking to target, in my case C.V.C. words. I think it's important to find sets that were specifically made to target certain phonics skills, because it will save you from having to sort through hundreds of clip-art images when you sit down to create. I found Kinka Art on TeachersPayTeachers to be very consistent.
2. Think 'Movable'' Verses 'Immovable' Parts
Think of Drag-and-Drop Slides Activities as having two separate elements: the parts you don't want to be moved around, and the movable parts. Let's talk about the parts you want to be "locked in" first.
But before that, the first thing you're going to need to do is change the default width/height ratio of the slides. The default setting is 16x9 inches, which could definitely work for some activities, but I usually just go with something closer to the ratio of 8 1/2 x 11 paper. This is because I take my printable worksheets and convert them to digital activities.
Go to "file" then "page set-up" and choose a custom ratio.


Once you have chosen a custom ratio for your slides, create all the parts of the activity you want to be immovable or locked in place. Do this just like you would create a normal worksheet.... use the text box tool, the table tool, the shape tool, etc. Insert and place your colored clip-art by clicking the "insert image" button in the top tool bar.
The only way to "lock" items in place on Google Slides, is to download the slide as an image and then change the slide's background to that image. There is no other way as of now. Go to "File," "Download," and download your immovable pieces as a "png file" because it retains higher quality than jpeg files.

Next, choose "Slide," "Change Background" and browse for the image you just downloaded.
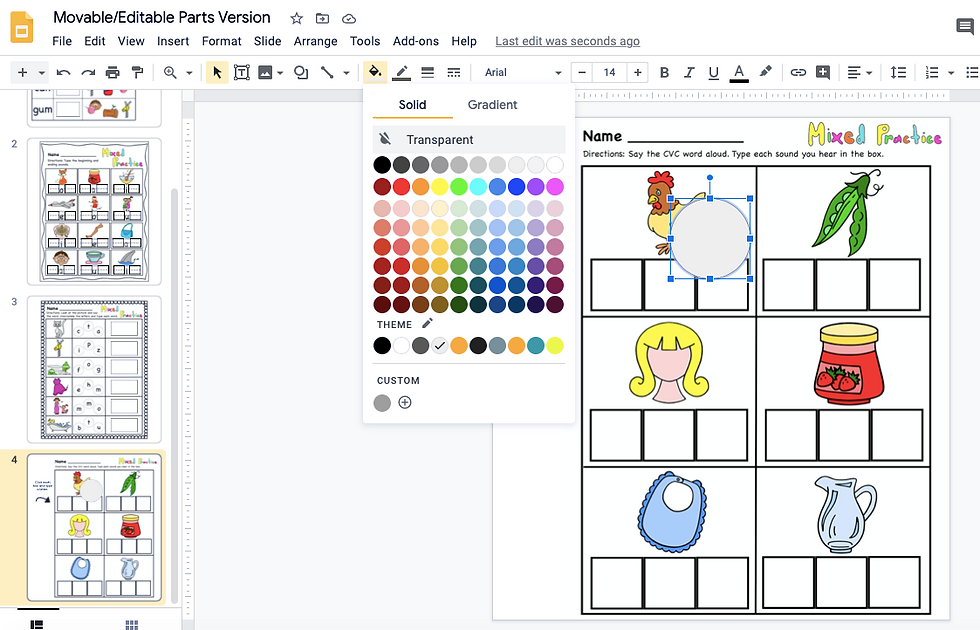
Once you have successfully changed your background, you can focus on creating your movable parts. I use circles often. Students "drag-and-drop" the circle over their answer choice. Find circles under "Shapes" at the top.

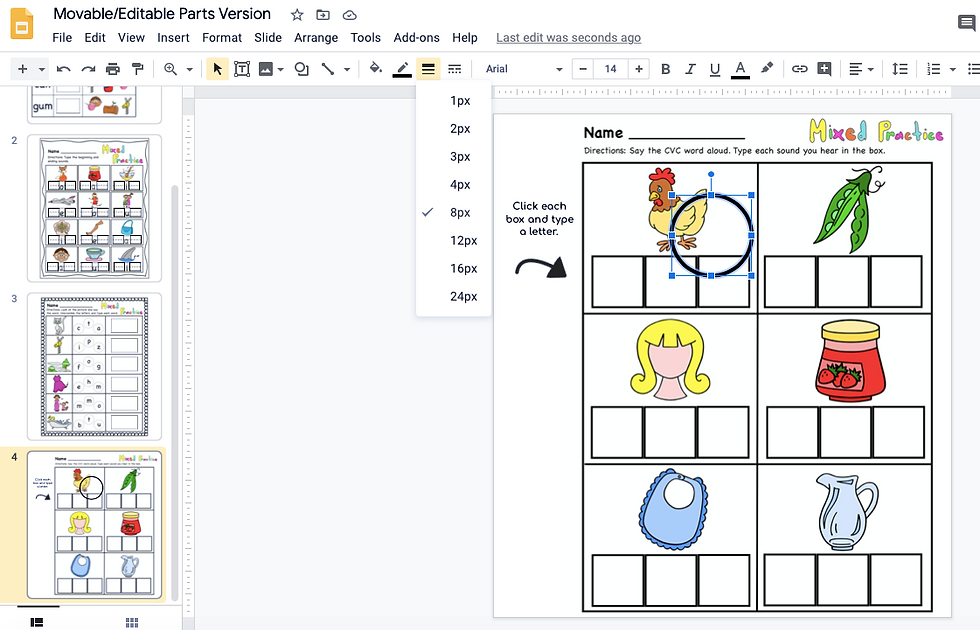
After you have selected it, set the fill to "transparent" and adjust the line color and boldness.


If you plan to use clip-art images as your movable parts, make sure the license agreement allows that. Many licenses allow this for personal use, but not if you want to sell your work.
3. Share Settings are Important
So now you're finished creating your activity and you wonder how to share it with the world. If you're using Google Classroom, or a similar platform, you don't have to worry about this because it manages copy settings for you. But if you just want to share with others but don't want them editing your original activity slide, here's how you do it....
Go to Share Settings and change your share settings to "anyone with the link can view."
Now the tricky part. Go up to the url and find the word "edit." Delete just the word "edit" and replace it with the word "copy."


Highlight and copy this (modified) link to share with colleagues or students if you're not using Google Classroom. When the receiver clicks on the link, it will prompt them to "make a copy" of the document/slide.
That's it! There's a bit of a learning curve at first, but once you learn it, you can create away to your heart's content!
View my K-1 Google Slides Reading Sets at my TeachersPayTeachers Store.
And check out this other post for an easy solution to use them as a Literacy Center without needing Google Classroom or gmail accounts for any of your students.


Comments